On a warm, sunny afternoon, a small and colourful insect makes the most of the daylight, feeding busily among garden leaves. With its shiny, dome-shaped shell of brightest red and bold black spots, it moves methodically over the foliage of a rose bush, hunting for tiny green aphids. This is a Seven-spot ladybird — one of the most easily recognisable of Britain’s 20,000-plus insect species. Beloved for their bright appearance and gentle presence in the garden, ladybirds are among the UK's favourite beetles.
It is no surprise, then, that this cheerful garden visitor makes the perfect inspiration for a nature-inspired seasonal craft project. In this easy ladybird card craft tutorial, beautiful handmade greetings cards are made using simple, everyday materials that you may already have at home. Whether you're looking for a fun children’s craft project or a peaceful moment in the craft room, this DIY ladybird card is the perfect way to bring a little piece of nature indoors and send it on to someone you love.
Materials you will need
Blank greetings cards
Card in red, black, yellow and blue
Ramekin and small jar lid (for tracing circles)
Pencil
Scissors
Double-sided tape
Black buttons
Alphabet stamps and ink-pad (or a fine pen for freehand writing)
How to make a ladybird greetings card
1. Draw and cut out the ladybird body
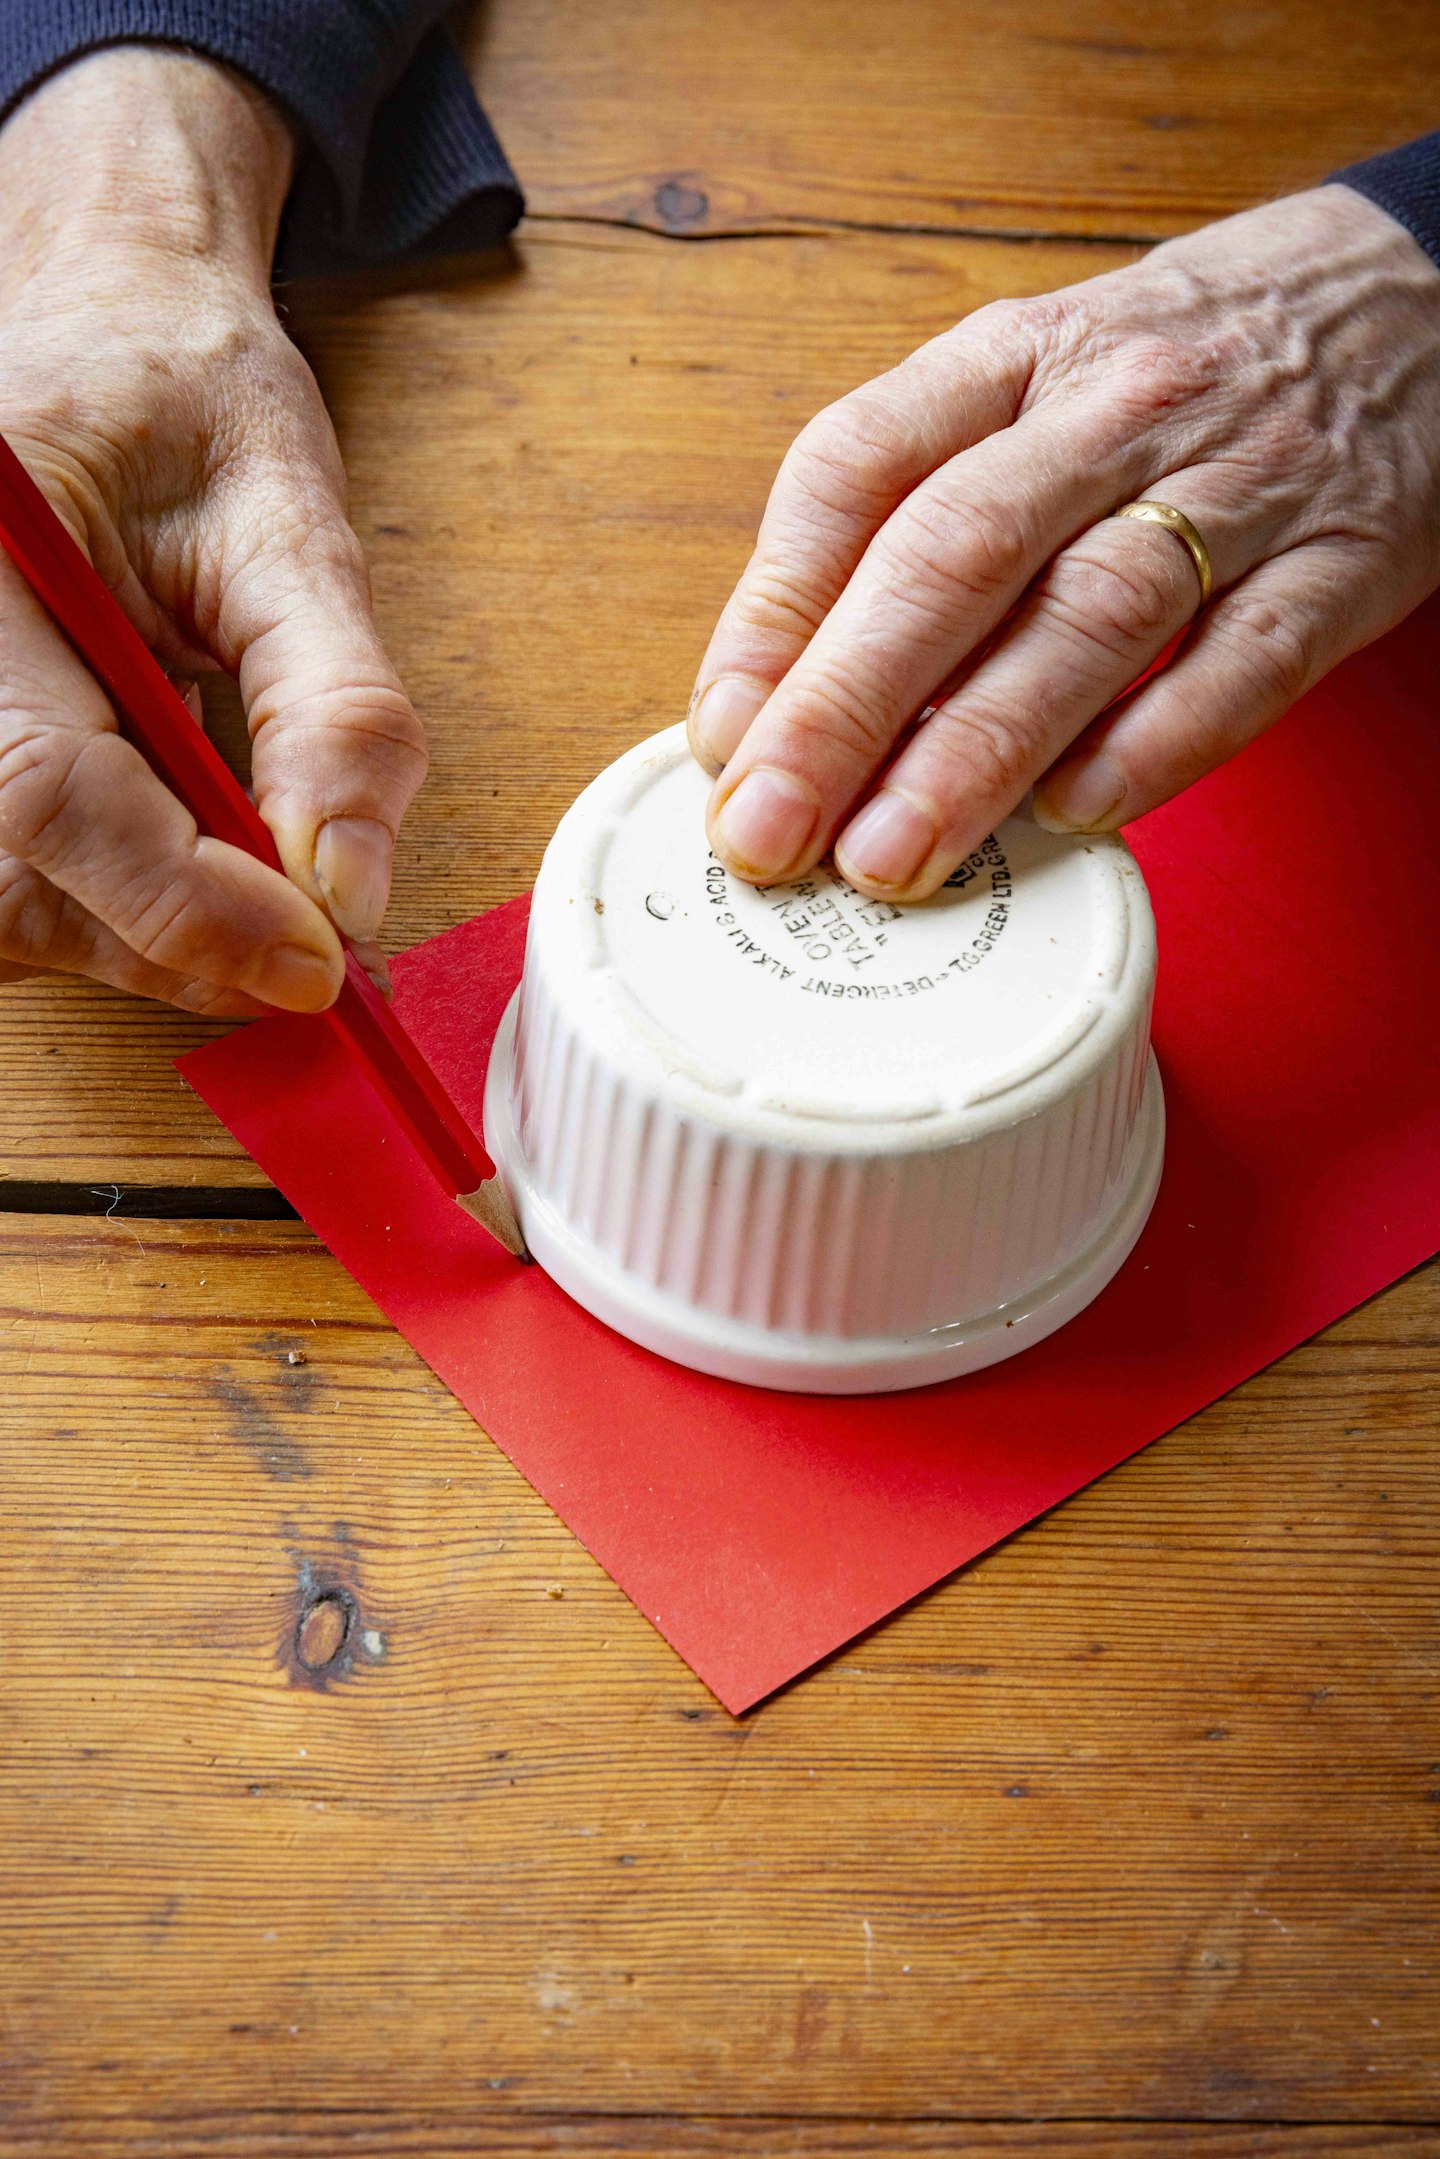
Using a ramekin or similar-sized round object, trace and cut a circle from the red card. Then, trace a black circle using a slightly smaller item to draw around. These will form the ladybird’s wings and body.
2. Create the head, antennae and wings
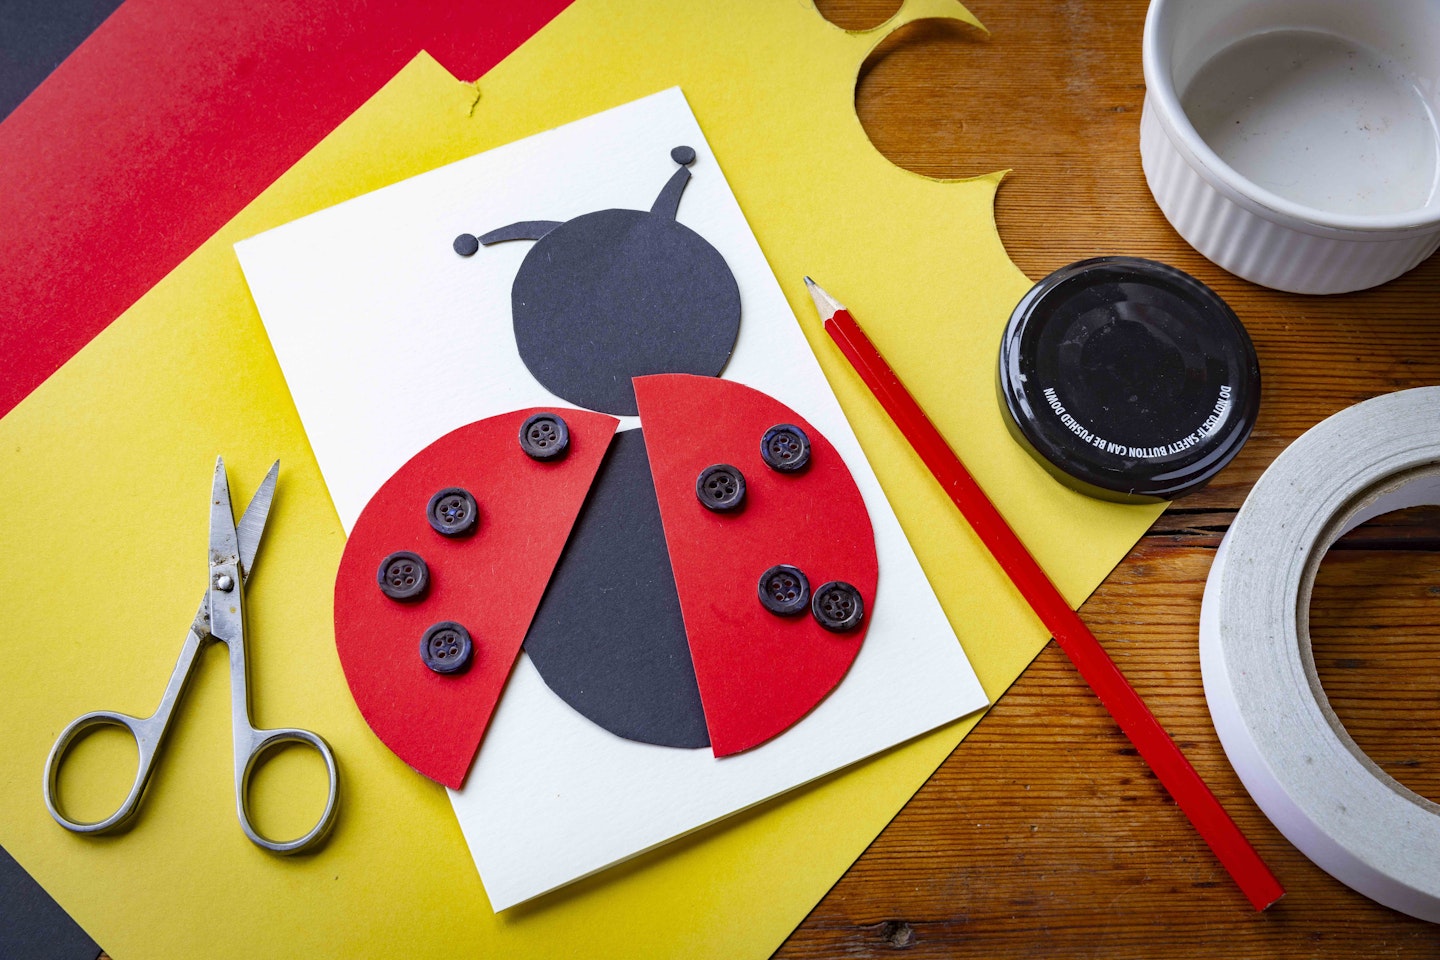
To make the head, cut another black circle in the same way, using a smaller lid. Use scraps of black card to cut out two freehand antennae. To create the wings, cut the red circle in half.
3. Assemble the ladybird
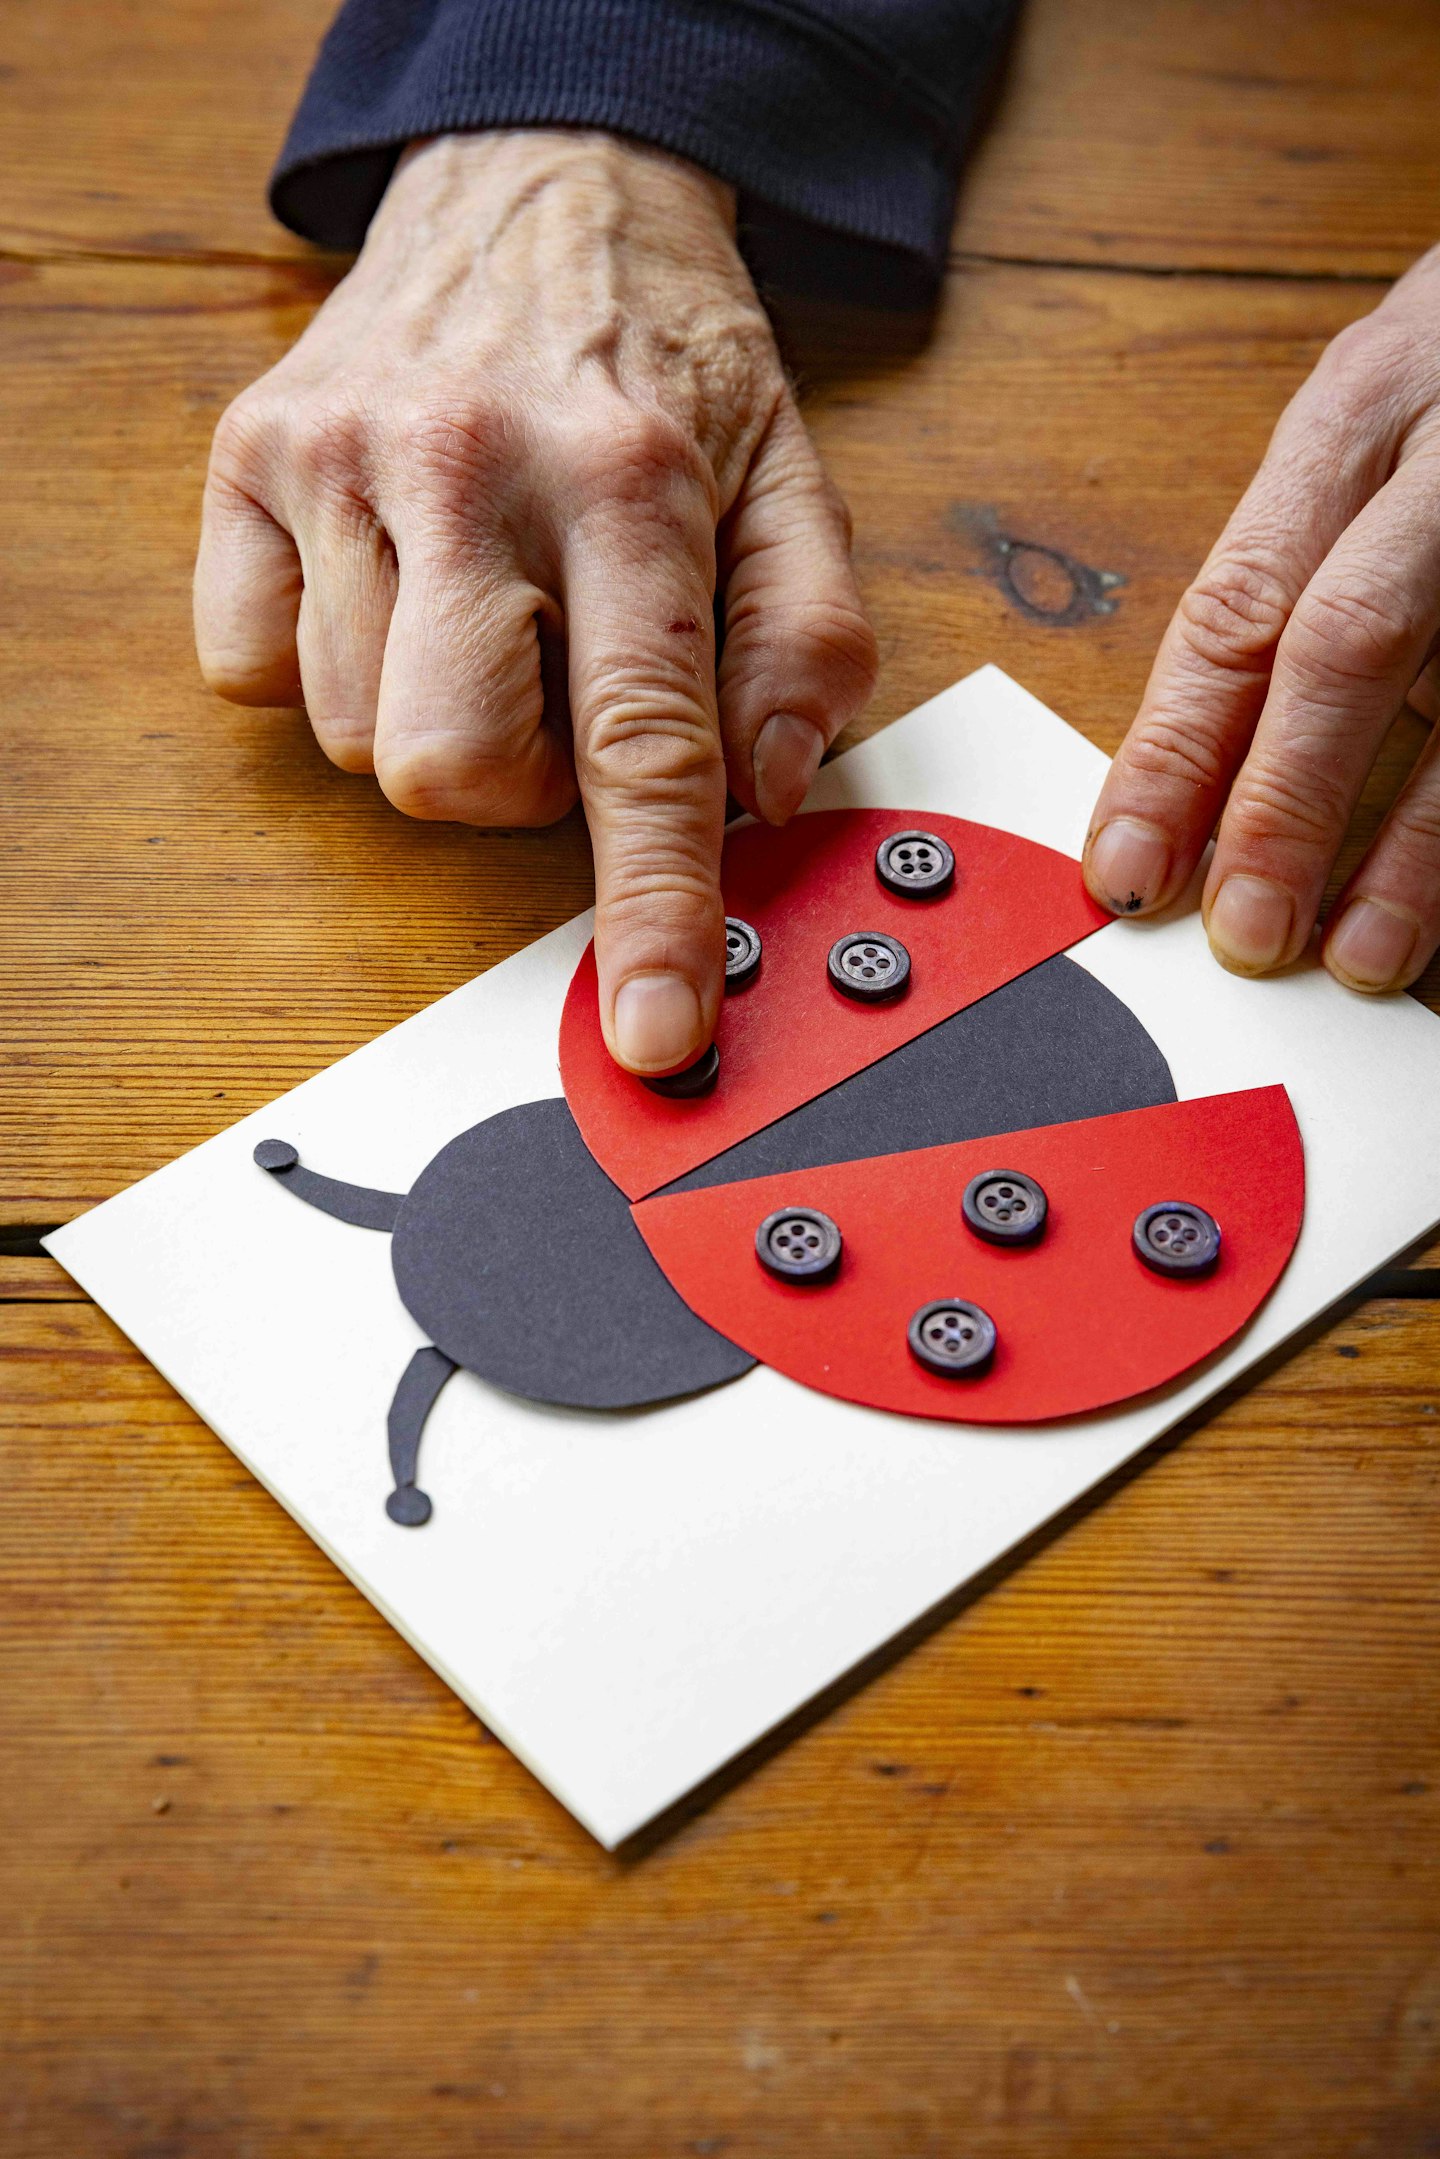
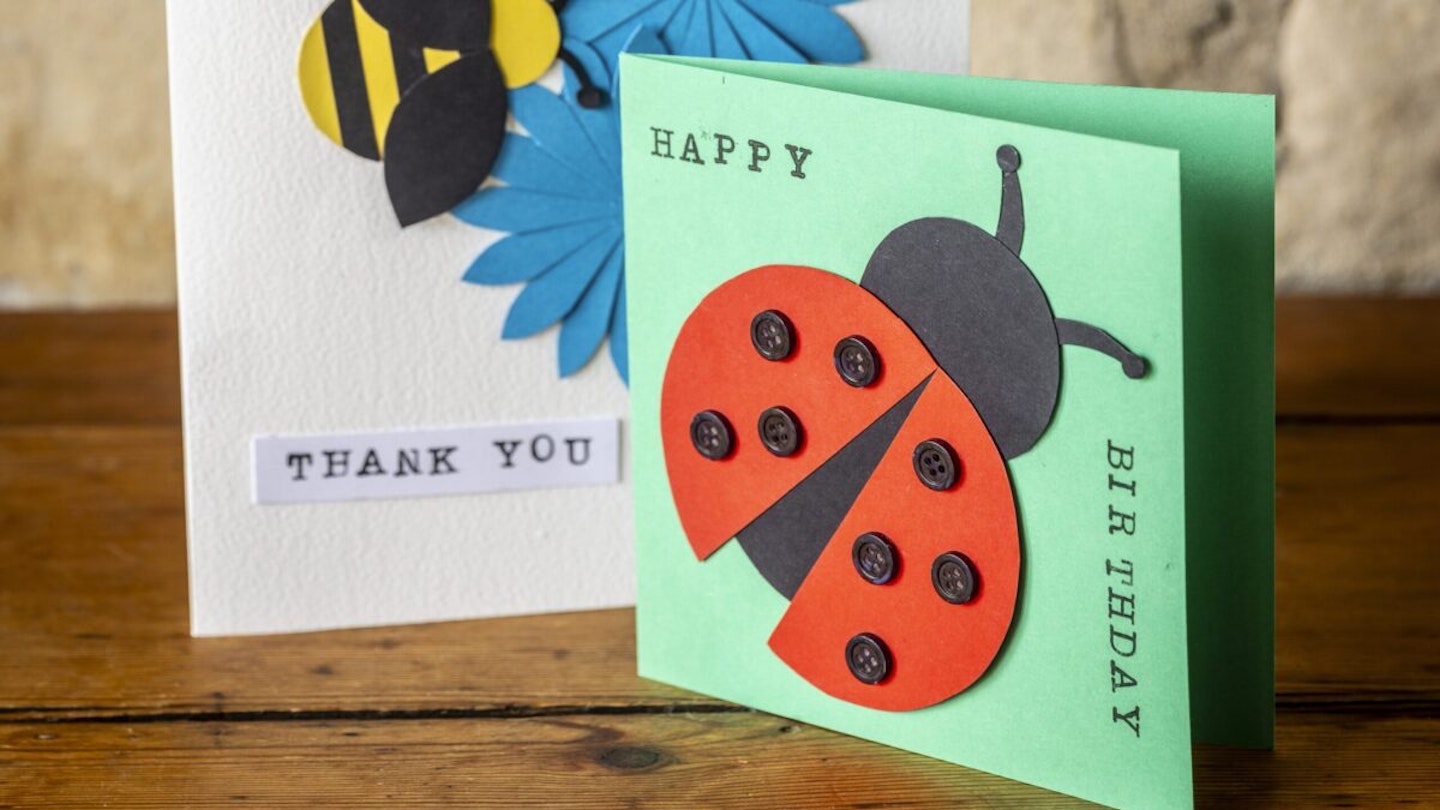
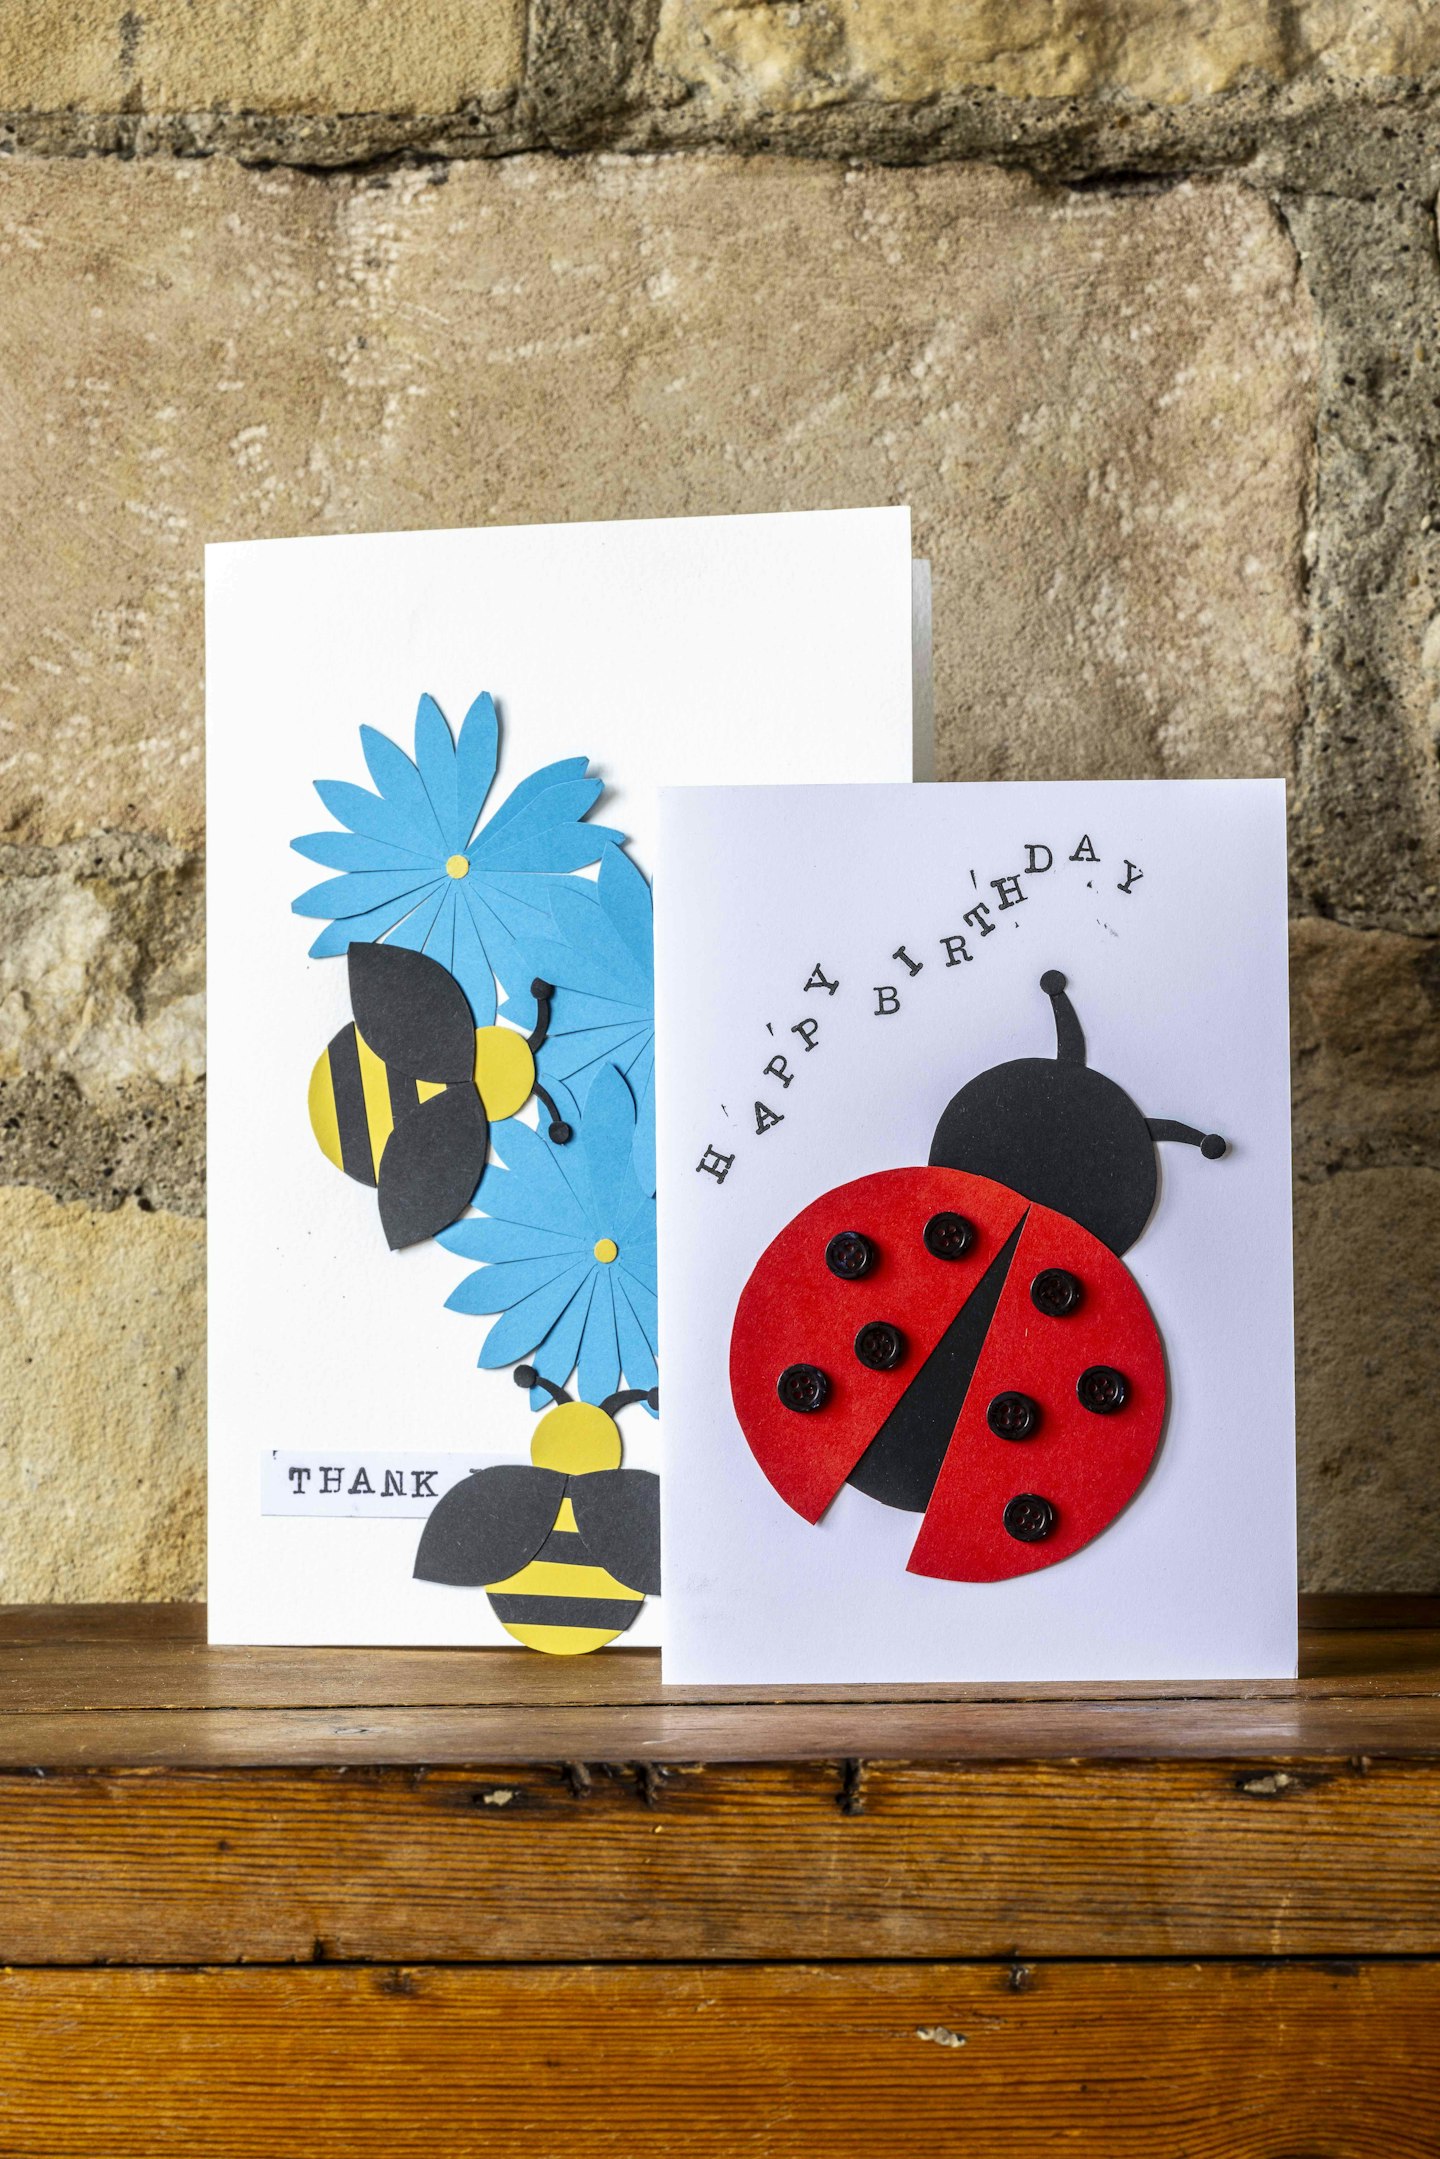
Stick the antennae onto your blank card first, followed by the black circles to create the head and body. Then, stick the two wings over the body, slightly apart. To finish your ladybird, glue small black buttons (or black paper circles) onto the wings to create spots.
How to make a bee greetings card
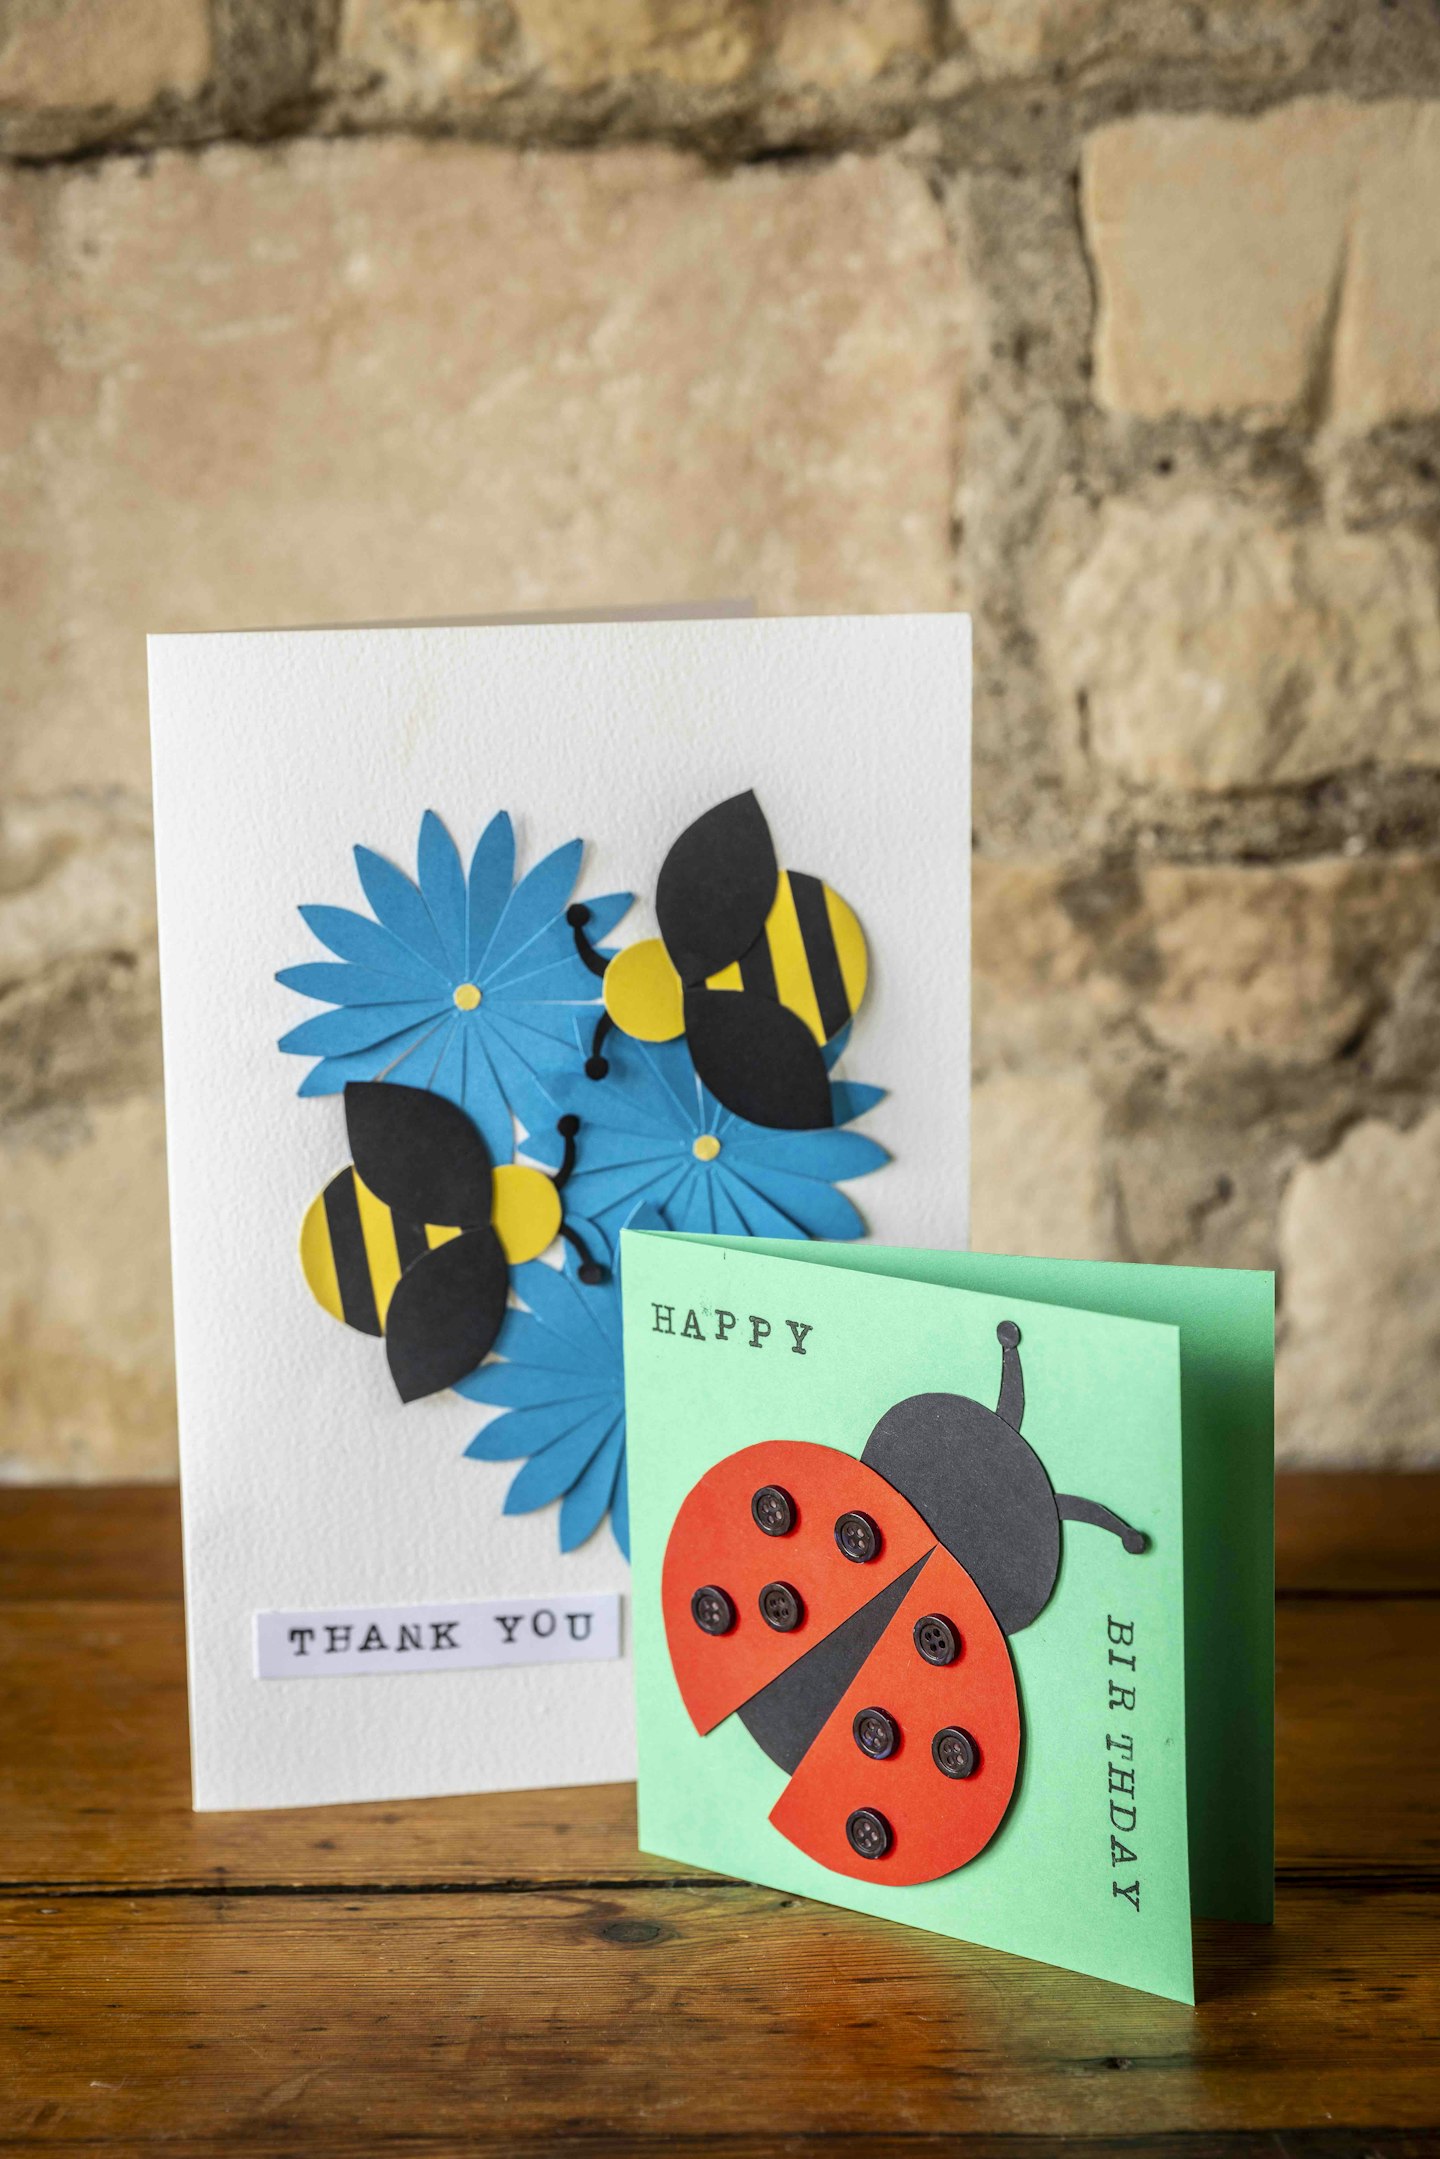
To create a cheerful bee design on a greetings card, begin by cutting one small and one large yellow circle from card to form the bee’s head and body. To make the stripes, cut a black circle – the same size as the body – and slice it into even strips. Stick alternate black strips horizontally across the body to give the classic bee look.
Using black card, cut out simple antennae and a pair of wings freehand.
Flowers are made by folding large blue circles of card into quarters and cutting petal shapes around the edge before folding them out again and sticking them down. Add a small yellow circle in the centre to complete each flower. Arrange the bees over the flowers and stick them down.
Finish your handmade bee card with a stamped or handwritten greeting – perfect for summer birthdays, thank you notes, or just to brighten someone’s day.
For more crafts subscribe to LandScape magazine today!
1.
Take out a LandScape Subscription

LandScape brings the fresh air of the British countryside into your home. With a mix of beautiful photography and in-depth features, it captures the very best of every season, from stunning landscapes and places to visit to the best of British traditional cookery and crafts. Choose the right Subscription offer for you… Receive 12 issues with free UK delivery to your door with a Print Subscription. Get easy access to the digital issues, subscriber rewards and more by taking out a Digital Subscription or choose a Print + Digital Subscription and get everything included.
Rachel Hawkins is a lifelong craft enthusiast and the respected editor of LandScape magazine. With more than 30 years in publishing, Rachel creates and curates inspiring DIY projects that blend traditional skills with modern creativity. She’s a trusted voice for readers seeking authentic, hands-on craft inspiration. Follow her on Instagram @rachel_hawkins_craft.